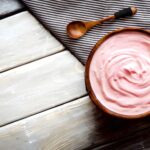
How to Make Homemade Yogurt
How to Make Homemade Yogurt
Making yogurt at home is a simple process, and it’s a fun way to enjoy fresh, creamy yogurt without any preservatives or artificial ingredients. Here’s a basic recipe to make yogurt using milk and a starter culture.
Ingredients
- 4 cups 1 quart whole milk (you can use 2% or skim milk, but whole milk will yield creamier yogurt)
- 2 tbsp plain yogurt with live active cultures store-bought or a previous batch
- 1-2 tbsp powdered milk optional, for thicker yogurt
- Sweetener optional: honey, maple syrup, or sugar, to taste (especially if making flavored yogurt)
- Vanilla extract optional, if you like vanilla yogurt
Instructions
- Heat the Milk:
- Pour the milk into a saucepan and set over medium heat.
- Slowly heat the milk to 180°F (82°C), stirring occasionally. This step helps denature the proteins in the milk, ensuring a smooth texture and preventing curdling.
- Cool the Milk:
- Once the milk reaches 180°F, remove it from the heat and let it cool down to about 110°F (43°C). This is the ideal temperature for the yogurt cultures to thrive. You can speed this up by placing the pot in a sink filled with ice water (make sure the water doesn’t touch the milk).
- Prepare the Starter Culture:
- In a small bowl, take 2 tablespoons of plain yogurt (from a previous batch or store-bought) and mix it with a few tablespoons of the cooled milk. Stir gently until it forms a smooth mixture.
- Mix the Culture into the Milk:
- Once the milk has cooled to 110°F, add the yogurt mixture to the warm milk, stirring gently to incorporate.
- If using powdered milk for extra thickness, add it at this stage and stir until fully dissolved.
- Incubate the Yogurt:
- Pour the milk and yogurt mixture into a clean container or jars.
- To incubate, you need a consistent warm temperature for the yogurt to culture. There are a few methods to do this:
- Oven method: Preheat your oven to 100°F (38°C) or use the oven’s “warm” setting. Turn off the oven, and place the jars or container inside. Keep the door closed and let the yogurt set for 6-12 hours (the longer it incubates, the thicker and tangier the yogurt will be).
- Yogurt maker: If you have a yogurt maker, follow the manufacturer's instructions.
- Instant Pot method: Use the “Yogurt” setting, which will heat the milk and maintain the temperature for incubation.
- Thermal Cooker method: Keep the yogurt in a thermos or insulated container for 6-12 hours.
- Check the Yogurt:
- After 6-12 hours, check the yogurt. It should be thickened and have a slightly tangy flavor. If it’s not thick enough, you can leave it for a few more hours.
- Once it’s to your desired thickness and taste, remove the yogurt from the incubator.
- Chill the Yogurt:
- Place the yogurt in the refrigerator for at least 2-3 hours to fully set and cool down before eating. This also helps it firm up a bit more.
Notes
Optional Add-ins:
Sweeten the yogurt: After it’s finished incubating, you can sweeten the yogurt to your liking by adding honey, maple syrup, or sugar. You can also add a little vanilla extract for a classic flavor.
Fruit yogurt: Stir in fresh or frozen fruit such as berries, mango, or bananas after the yogurt has set and chilled. For fruit-flavored yogurt, you can also cook the fruit down into a compote and mix it in for a smooth texture.
Greek yogurt: For thicker Greek yogurt, you can strain the yogurt through a fine-mesh sieve or cheesecloth to remove some of the whey. Let it strain for a few hours in the fridge. Tips:
Starter culture: If you’re using store-bought yogurt as a starter, make sure it contains live active cultures, which will help ferment the milk. You can save a few tablespoons of your homemade yogurt to use as a starter for the next batch.
Consistency: If your yogurt is too runny, you can strain it for a thicker consistency or add a little powdered milk next time.
Flavor options: Try adding different flavorings, such as cinnamon, cocoa powder, or fruit purees, once the yogurt has finished incubating and chilling.

